Step 1
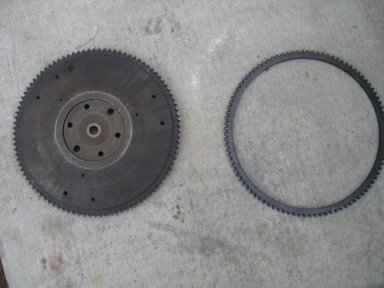
While into disecting your project, many times you come across a
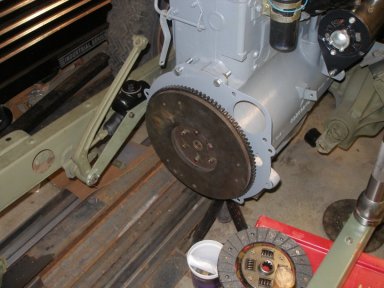
weak starting issue. In many cases, it is due to a flywheel ring
gear being worn out. Here you see a perfect example where the
flywheel ring gear are nearly completely worn out.
|
Step 2
Replacing the ring gear is not a difficult task. Here we
show the new 97 tooth ring gear with the new replacement.
You will need: - a torch to heat the [ring gear] off and heat the new one on -Gloves -Hammer -Punch -4x4 block of wood. new Ring Gear |
Step 3
Place the flywheel on the 4x4 block of wood. Heat the ring gear
for about 2 passes all the way around the ring with the machined
side up. This will expand the ring from the flywheel.
|
Step 4
Turn the torch off, and quickly tap the ring from the flywheel.
This should only take a couple of taps around the ring and the
old ring gear should fall off.
|
Step 5
Turn the flywheel over with the machined side down, then place
the new ring gear on the flywheel (still on the 4x4 block), the
ring gear should be a little short of fitting on the flywheel.
Now heat the the ring gear up with a torch (as you did before
taking it off). The ring gear will expand enough after you take
about 2 passes around the gear.
|
Step 6
Turn the tourch off and grab your punch and hammer and tap the
ring gear evenly around the flywheel.
Tip: You want to avoid having the new ring gear cool off..having to re-heat it as it could cause warping. |
Step 8
Wow, what a difference when you compare the old worn ring gear
to a new one! Looks great, and now the starter will hit the gear
terrific.
|
Step 9
Here you see the flywheel installed on the crank and looks
great, ready for the clutch plate to be installed.
Special thanks to Mike H. who provided the pictures and details for this article. |